Local pickup is supported; delivery details are confirmed at checkout
Production timing will be confirmed based on artwork complexity
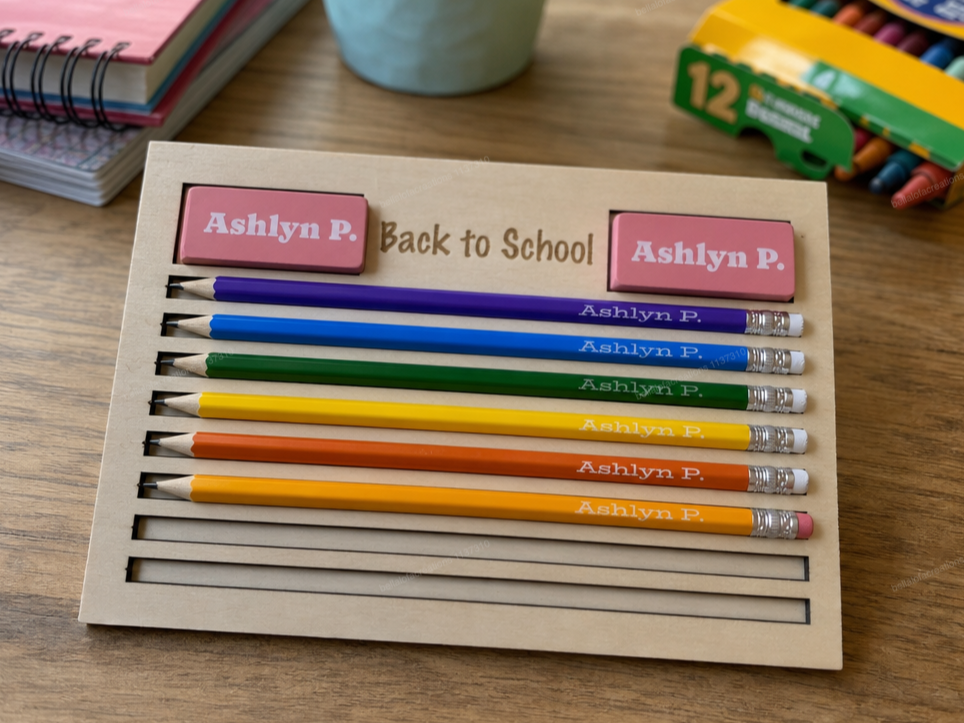
1. : <p style="margin-left:0px;"><span><strong>Materials Needed:</strong></span></p><p style="margin-left:40px;"><span> Material: 1 sheet of </span><span style="color:rgb(0,0,0);">12X12</span><span> inch </span><span style="color:rgb(0,0,0);">3mm</span><span> Basswood</span></p><p style="margin-left:40px;"><span> </span><strong>Machine:</strong><span> xTool M2 (or similar laser cutter)</span></p><p style="margin-left:40px;"><span> Wood glue</span></p><p style="margin-left:0px;"><strong>Phase 1: Cutting & Assembling the Jig</strong></p><p style="margin-left:40px;"><span>1. Prepare the File in XCS:</span></p><p style="margin-left:80px;"><span> Open the file in xTool Creative Space.</span></p><p style="margin-left:80px;"><span> </span><strong>Important:</strong><span> Delete or hide all </span><strong>green</strong><span> instructional text, arrows, and notes before processing.</span></p><p style="margin-left:80px;"><span> </span><i>Optional:</i><span> You can leave or delete the yellow sample text boxes ("Name", "Name Here")—these are just visual placeholders to show where custom text belongs.</span></p><p style="margin-left:40px;"><span>2. </span><strong>Cut the Jig:</strong></p><p style="margin-left:80px;"><span> Place your </span><span style="color:rgb(0,0,0);">12X12</span><span> sheet of </span><span style="color:rgb(0,0,0);">3mm</span><span> basswood into the laser bed.</span></p><p style="margin-left:80px;"><span>Run the cut job to produce the main jig frame, eraser/pencil cutouts, header text, and the large rectangular </span><strong>Backing piece</strong><span> (all designed to fit on that single </span><span style="color:rgb(0,0,0);">12X12</span><span> sheet).</span></p><p style="margin-left:40px;"><span>3. </span><strong>Assemble the Base:</strong></p><p style="margin-left:80px;"><span> Apply a light layer of wood glue to one side of the large rectangular </span><strong>Backing piece</strong><span>.</span></p><p style="margin-left:80px;"><span> Align and glue it directly to the </span><strong>underside of the pencil slot section</strong><span> on your main frame.</span></p><p style="margin-left:80px;"><span> </span><i>Why?</i><span> This creates a solid bottom for the pencil tray so the pencils sit level without falling through.</span></p><p style="margin-left:80px;"><span> Let the glue dry flat completely.</span></p><p style="margin-left:0px;"><strong>Phase 2: Engraving Your Products</strong></p><p style="margin-left:40px;"><span>1. </span><strong>Load the Jig:</strong></p><p style="margin-left:80px;"><span> Place your assembled jig in the xTool M2 bed </span></p><p style="margin-left:80px;"><span> Drop two rectangular pink erasers into the top slots and lay pencils into the pencil grooves.</span></p><p style="margin-left:40px;"><span>2. </span><strong>Set Text & Alignment in XCS:</strong></p><p style="margin-left:80px;"><span> Use the </span><strong>yellow placeholder text</strong><span> as a guide for where to align your customer’s personalized names on the screen.</span></p><p style="margin-left:80px;"><span> Resize or change the font depending on preference and pencil/eraser space.</span></p>